Modifying Profile Colour In Drawing Module
In Drawing module, users are able to adjust and change the colour of the all the elements before exporting the drawing.

However the change of members’ colour is only visible in drawing module. During exporting the drawing, there will be a layer setting to adjust the color of all the elements.
To understand on the layer setting during DXF export, please refer to DXF Export > Layers
In order to change the colour of the members in drawing module, several methods can be done explained below:
Method 1 : Property Editor
This is a manual method to edit the colour of members after the viewport was created.
- In drawing module, double left click on the member in viewport to access the profile editor.
(To select multiple members, highlight only members with same entity (ie. frame, bolt, plate) and press "Enter". If Two different entities members were highlighted, nothing will pops out.) - Change the "Line Color" for Line Thickness and click apply.
(Grayed option can be ticked, if you wish to gray out certain members without changing their default colour.)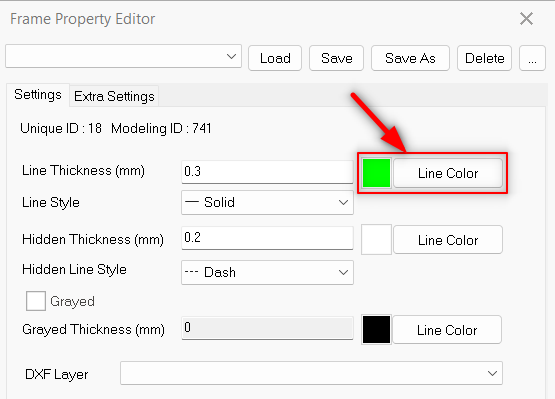
Alternatively, user can preset the colour in "Import Defaults" before creating viewports.
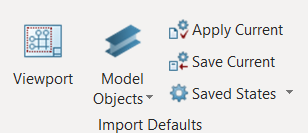

Take note once "Import Defaults" changes, it applies to all other projects as well, when creating new viewports.
Method 2: Change Profile Drawing
This method allows user to preset a property colour/setting and apply to existing viewport(s) in a template method.
- In drawing module, go to Tools tab > hold Shift key and left click on "Change Profile Drawing"
 , to preset the template.
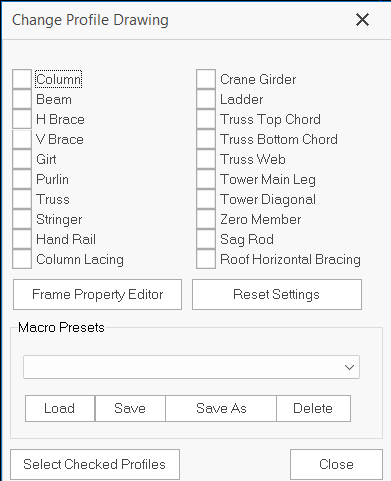
- Tick to select the element(s).
- After ticking the element(s), user may perform:
- Frame Property Editor: this allows user to preset the select element(s).
Element that has not been modified in term of colour will follow the default line colour which is white colour. - Reset Settings: this allows user to reset the previous preset of the selected element(s).
- Once complete the preset, user may save/save as in the Macro Presets and able to be loaded to other project.
- Finally, to apply the preset colour/setting to the elements, left click to select viewport(s) and left click the "Change Profile Drawing"
 icon once.
 - "Select Checked Profiles" is an extra feature to show the ticked elements in Change Profile Drawing dialogue. When a viewport is selected, by clicking "Select Checked Profiles" will auto highlight the ticked elements in red in the viewport.